Halloween Pumpkin Cupcake Topper Affinity Designer
Published on BellaOnline.com
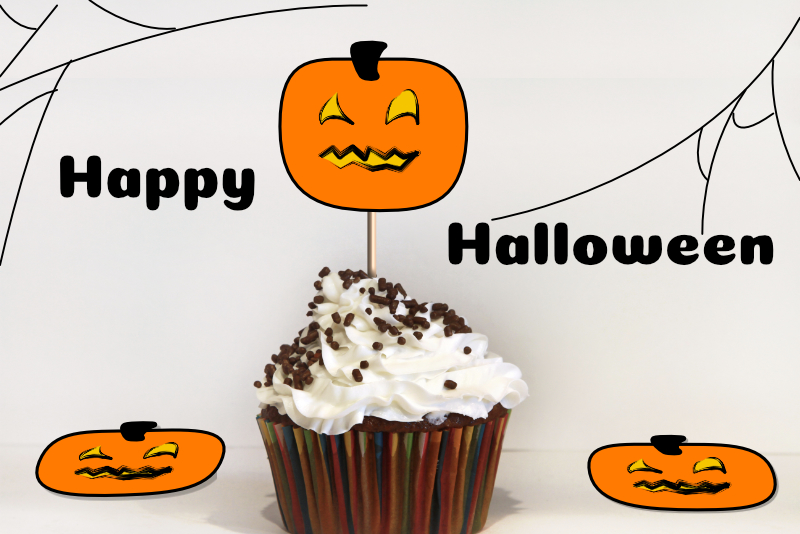
In this Affinity® Designer and Silhouette® Studio tutorial, we will create a Halloween pumpkin cupcake topper. We will begin in Affinity Designer where we will create the pumpkin image and finish in Silhouette Studio using the Print and Cut feature.
The Silhouette Cameo 5 was supplied to me by Silhouette America.
Silhouette, Silhouette Studio, Silhouette Connect, PixScan, Silhouette CAMEO and Silhouette Portrait are either registered trademarks or trademarks of Silhouette America, Inc. Product screen shot(s) reprinted with permission from Silhouette America, Inc.
Create the Pumpkin
- Start a new 8 x 8 inches document at 300 dpi in Affinity Designer.
- Draw an oval with the Ellipse tool that is about 6 inches tall.
- From the Context Toolbar, click Convert to Curves.
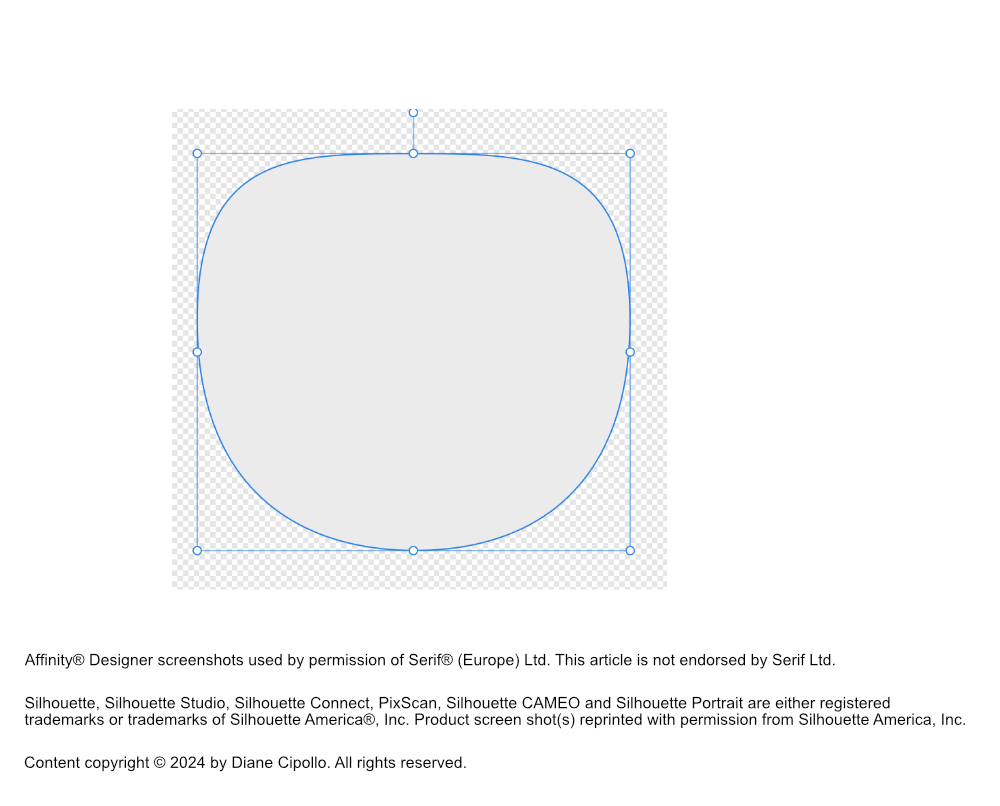
- Select the top Node and drag it down just a little with the Node tool, to flatten the top of the pumpkin. (see screenshot)
- Select the bottom Node and drag up just a little, to flatten the bottom.
- Resize the new pumpkin shape to about 6 inches tall.
- Set the Fill color for the pumpkin to orange FE7A00 and the Stroke color to black 000000.
- Set the Stroke Width to 6 pts.
- With the Trapezoid tool, draw a trapezoid at the top of the pumpkin for the stem.
- Set the Fill and Stroke colors to black 000000.
- With the stem still selected, click the Convert to Curves button.
- Select each corner of the trapezoid one at a time and click the Smooth icon in the Context toolbar, to smooth the corners.
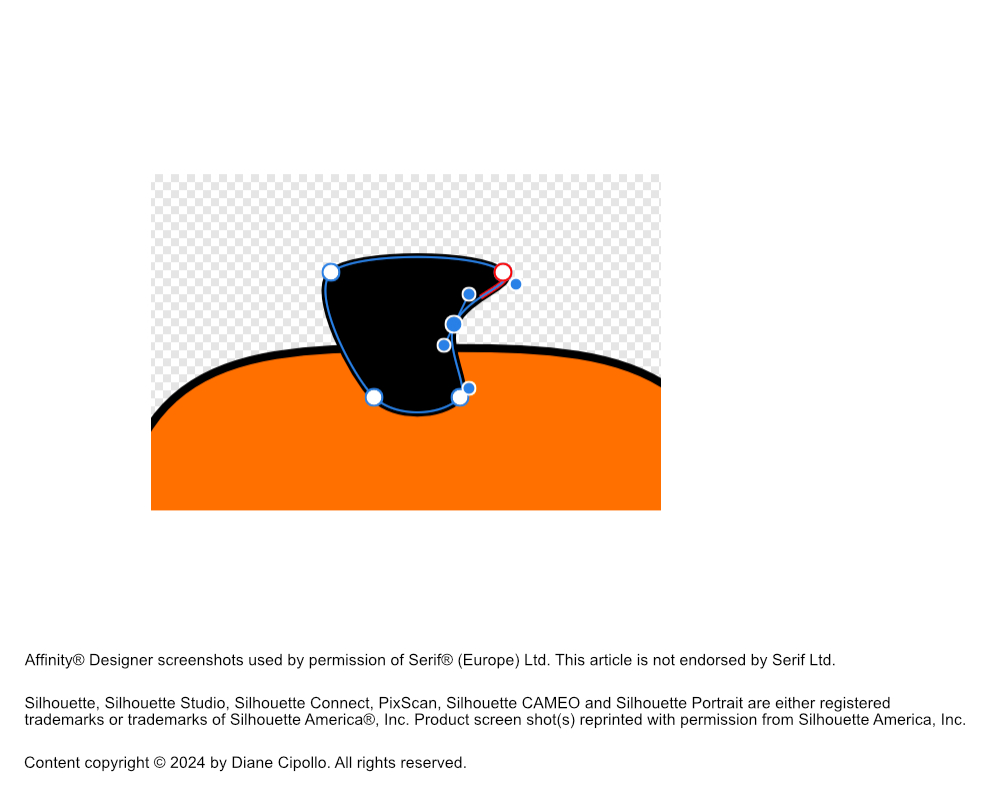
- To add another node to the trapezoid, click on the line between two nodes. Use the Node tool to reshape the trapezoid in to the stem of the pumpkin. Repeat if you like. (see screenshot)
- With the Triangle tool, draw a triangle for one eye of the pumpkin.
- Set the Fill color to yellow F5C600 and keep the Stroke color set to black 000000.
- Click the Convert to Curves button and click the stroke between two nodes to add a new node. Drag the new node to reshape the line. Repeat until you like the shape of the eye.
- With the eye still selected, open the Inks section of the Brushes panel. Click on the Ink brushes until you get the look you like. In the example, we used Number 64, Creative Ink 1.
- Increase the Stroke Width as you like.
- Right click on the eye layer in the Layers panel and duplicate.
- Drag the eye to the other side of the pumpkin face. Reshape this eye so that it is different from the first.
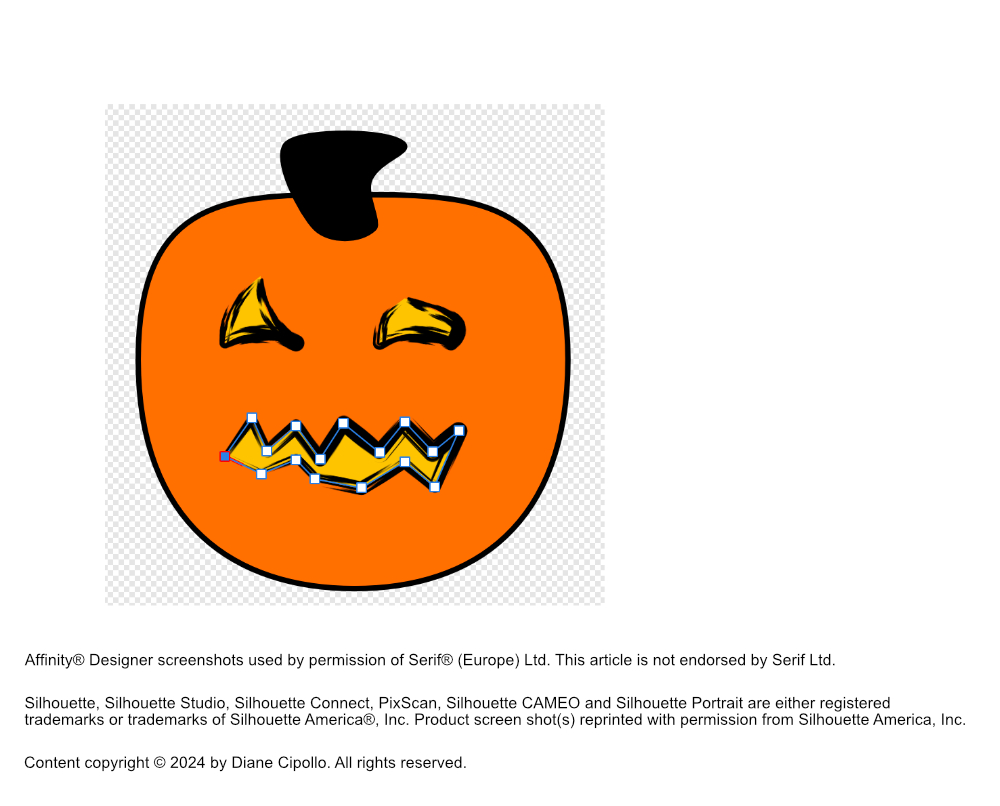
- Use the Pen tool to add a zig zag mouth shape. Use the Move tool to reshape the mouth as you like.
- Add the Brush to the stroke line and increase the Stroke Width as needed.
- Save the pumpkin as an PNG file, to preserve the transparent background.
Now we will add the face.
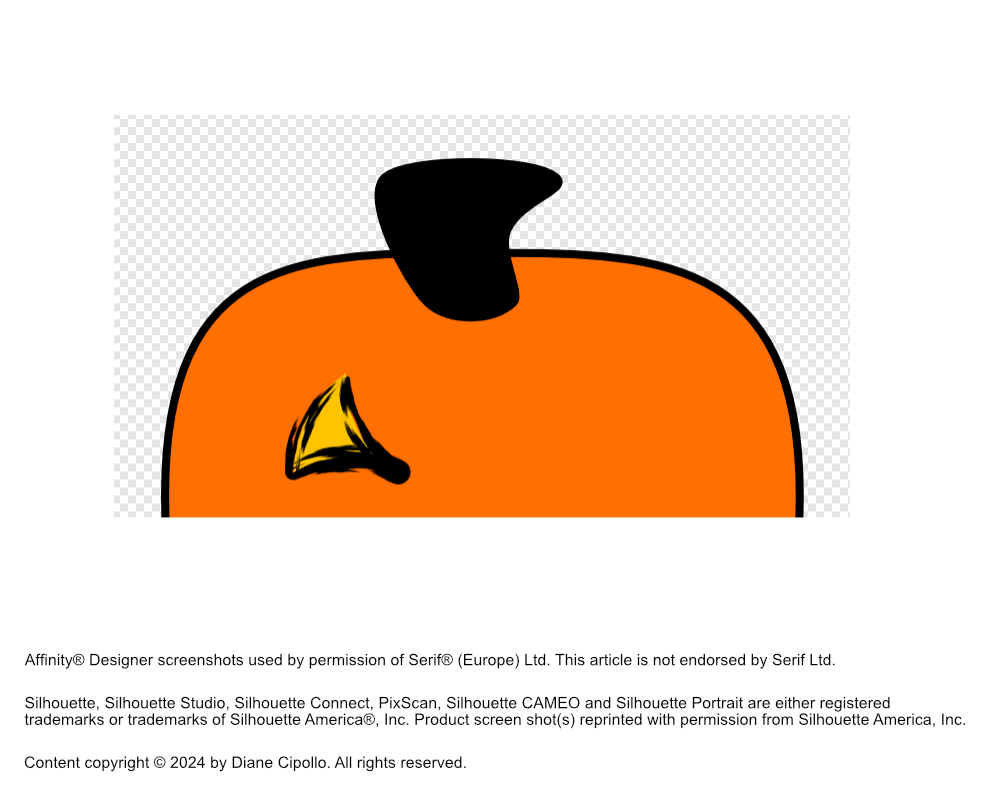
Let’s reshape the triangle just a little. (see screenshot)
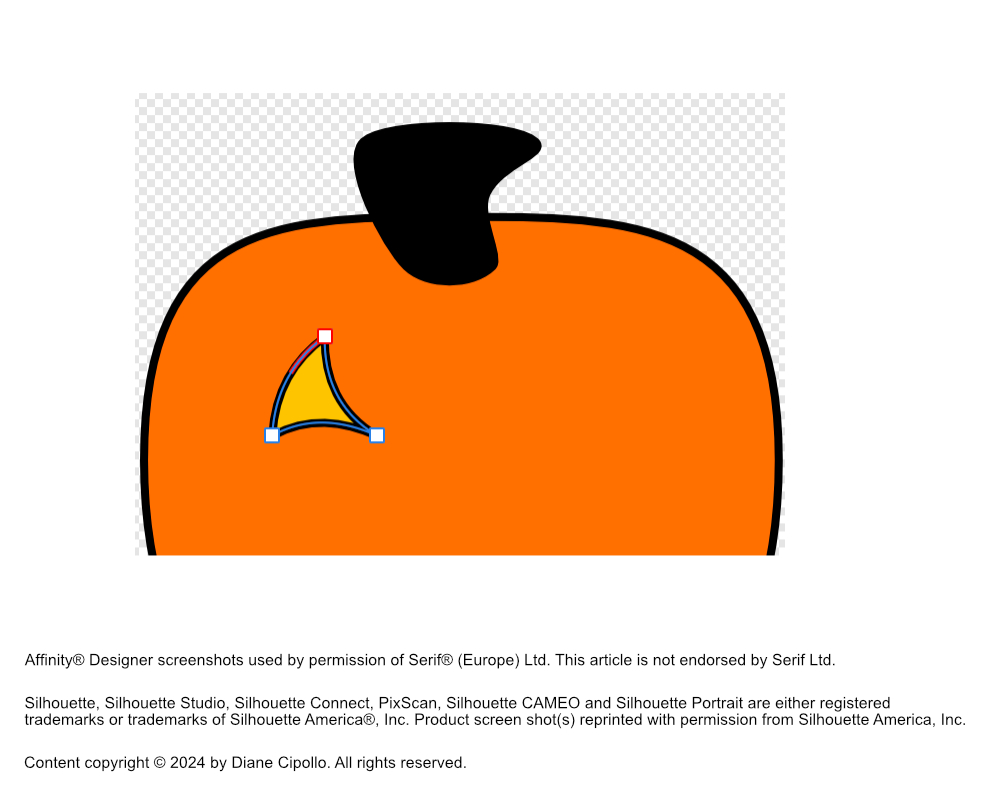
Let’s add a brush stroke to the eye. (see screenshot)
Now we will add the mouth. (see screenshot)
Print and Cut
- Open Silhouette Studio and click the Design tab to enter the workspace.
- Open the Page Setup panel and set the Media Size to Letter and the Orientation to Portrait.
- Open the Print and Cut panel and turn on the Registration Marks.
- From the Menubar, click File – Merge to open the pumpkin topper png.
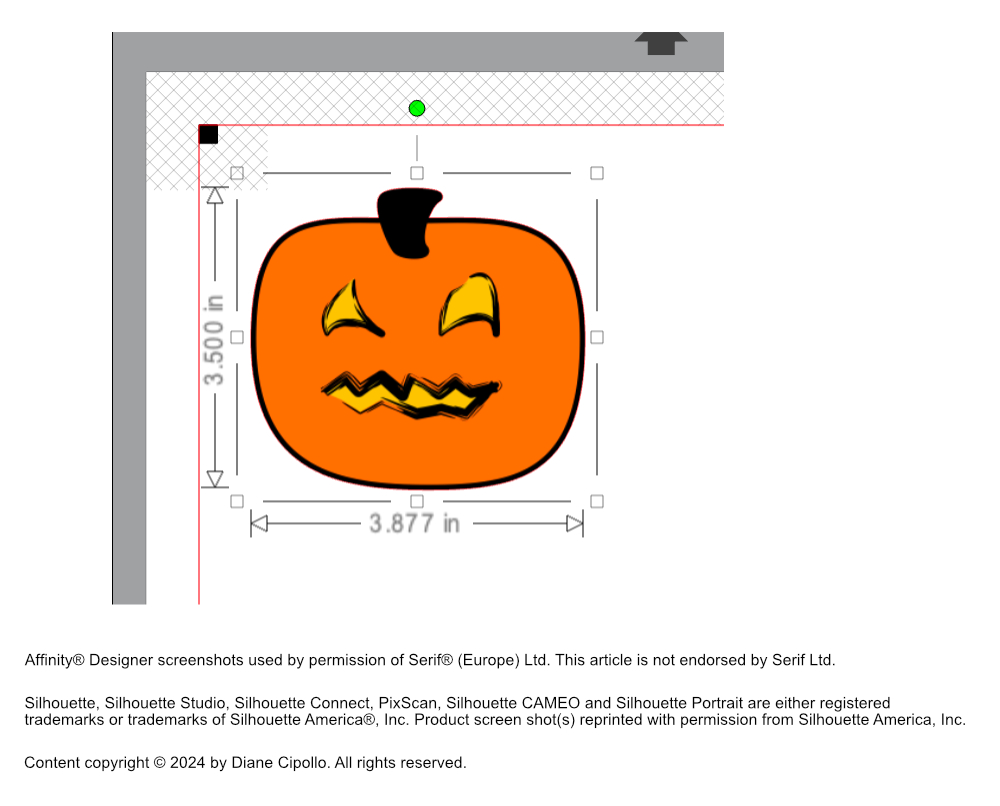
- Resize the pumpkin topper to be about 3.5 inches tall or the size you wish. Duplicate the pumpkin as needed. Position within the Registration Marks. (see screenshot)
- From the Menubar, click File – Print to send the pumpkin to the printer.
- Place the pumpkin print out in the Silhouette cutting machine.
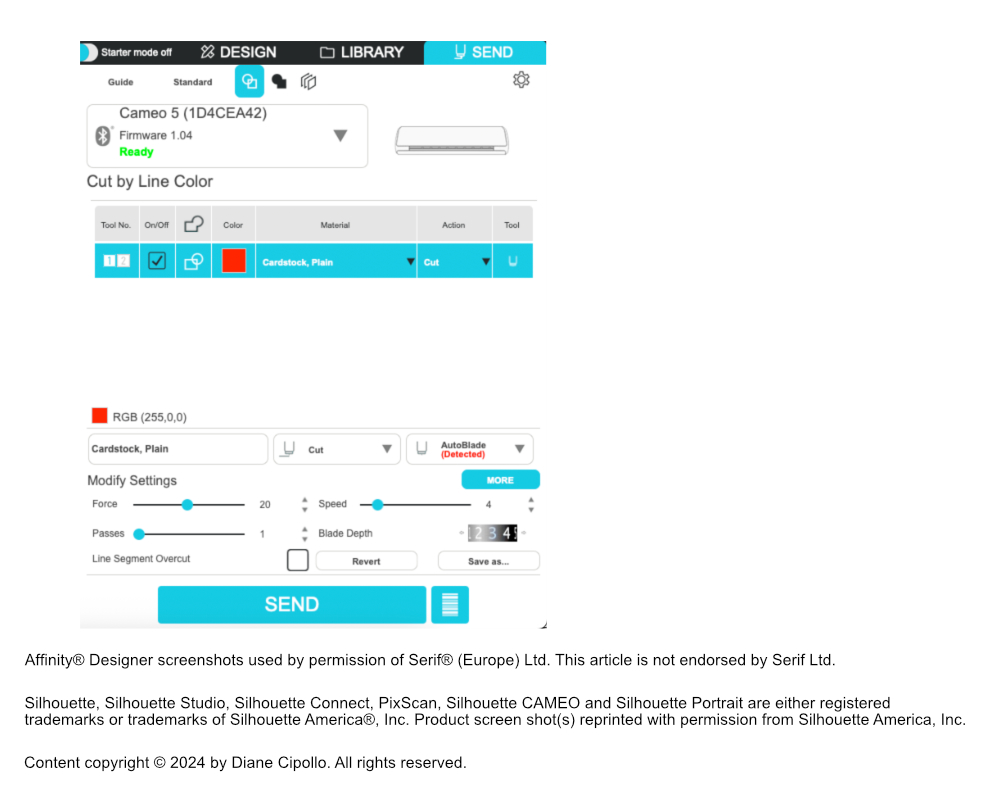
- In the Send panel, click the Cut By Line color tab.
- Click the Send button to cut the pumpkin topper. (see screenshot)
The Silhouette Cameo 5 was supplied to me by Silhouette America.
Silhouette, Silhouette Studio, Silhouette Connect, PixScan, Silhouette CAMEO and Silhouette Portrait are either registered trademarks or trademarks of Silhouette America, Inc. Product screen shot(s) reprinted with permission from Silhouette America, Inc.